

How To Make A Window Cling Stick
I've already shared a agglomeration of tips and tricks for working with standard vinyl, glitter vinyl, heat-transfer vinyl, and holographic/foil vinyl; and I've got two other products I want to comprehend for you lot. Next month, I'll dive in deep to Cricut's stencil vinyl, but today I want to prove yous one of their lesser-known products: Window Cling! Let me show you the nuances of cut Window Cling on a Cricut and evidence y'all some best practices should you want to use it to decorate your home likewise!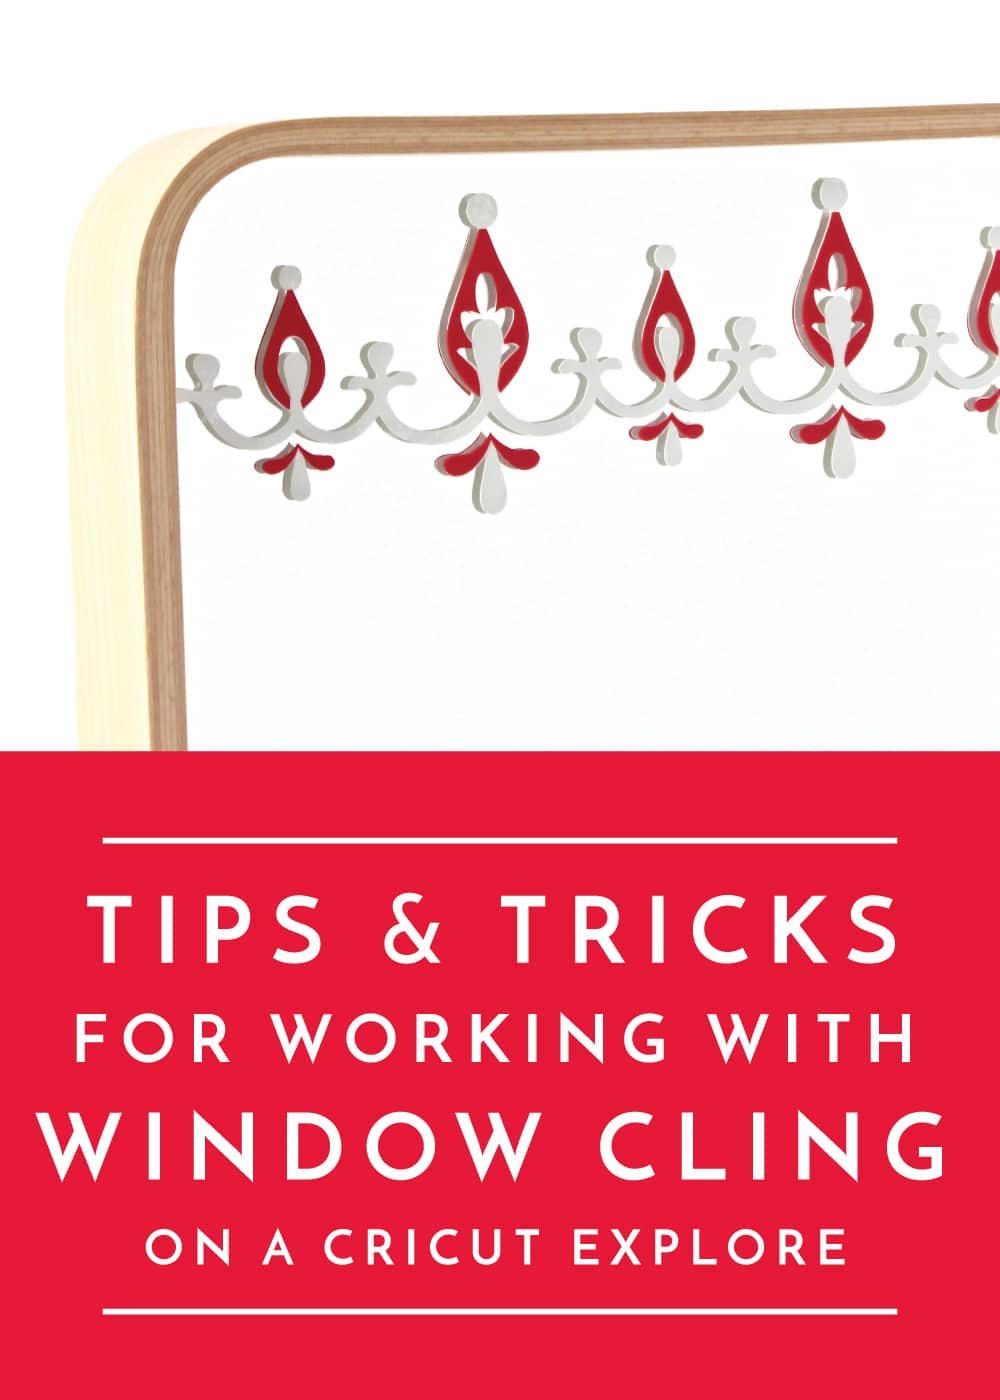
What Is Window Cling?
Fifty-fifty if you haven't personally crafted with a window cling-like material, you lot tin still probably sympathise what it is and how information technology works…especially if you've ever used vacation decals for your windows or applied a logo or design to your car's back windshield. Window Cling comes on rolls and looks and cuts a lot like standard vinyl, only it doesn't have the sticky, residue-like agglutinative on the back. Instead, it has a more rubbery, static-like quality that allows it to stick to slick items such as glass and mirrors. All-time of all, Window Cling is very temporary and can be easily and apace pulled off your surface without much effort or leaving whatsoever tackiness behind. In short, information technology'southward a bully product to employ to safely utilize temporary designs to whatever slick surface!
Processed Buffet | NC Home Office
I really made the in a higher place projects using standard vinyl long before Window Cling was widely available. Withal, I distinctly remember having to pull all those vinyl labels off the treat jars afterwards the birthday party. Not only were they incredibly tedious to remove, just the vinyl left a lot of residuum behind. As such, projects such equally temporary labels, mirror decorations and window decals (like for holiday decorations!) are best made from Window Cling!
Supplies Needed
Cutting and applying Window Cling to glass-like surfaces will look and feel a lot similar working with vinyl with a few notable exceptions. Here'south what yous need to create temporary decorative details similar those shown in this post:
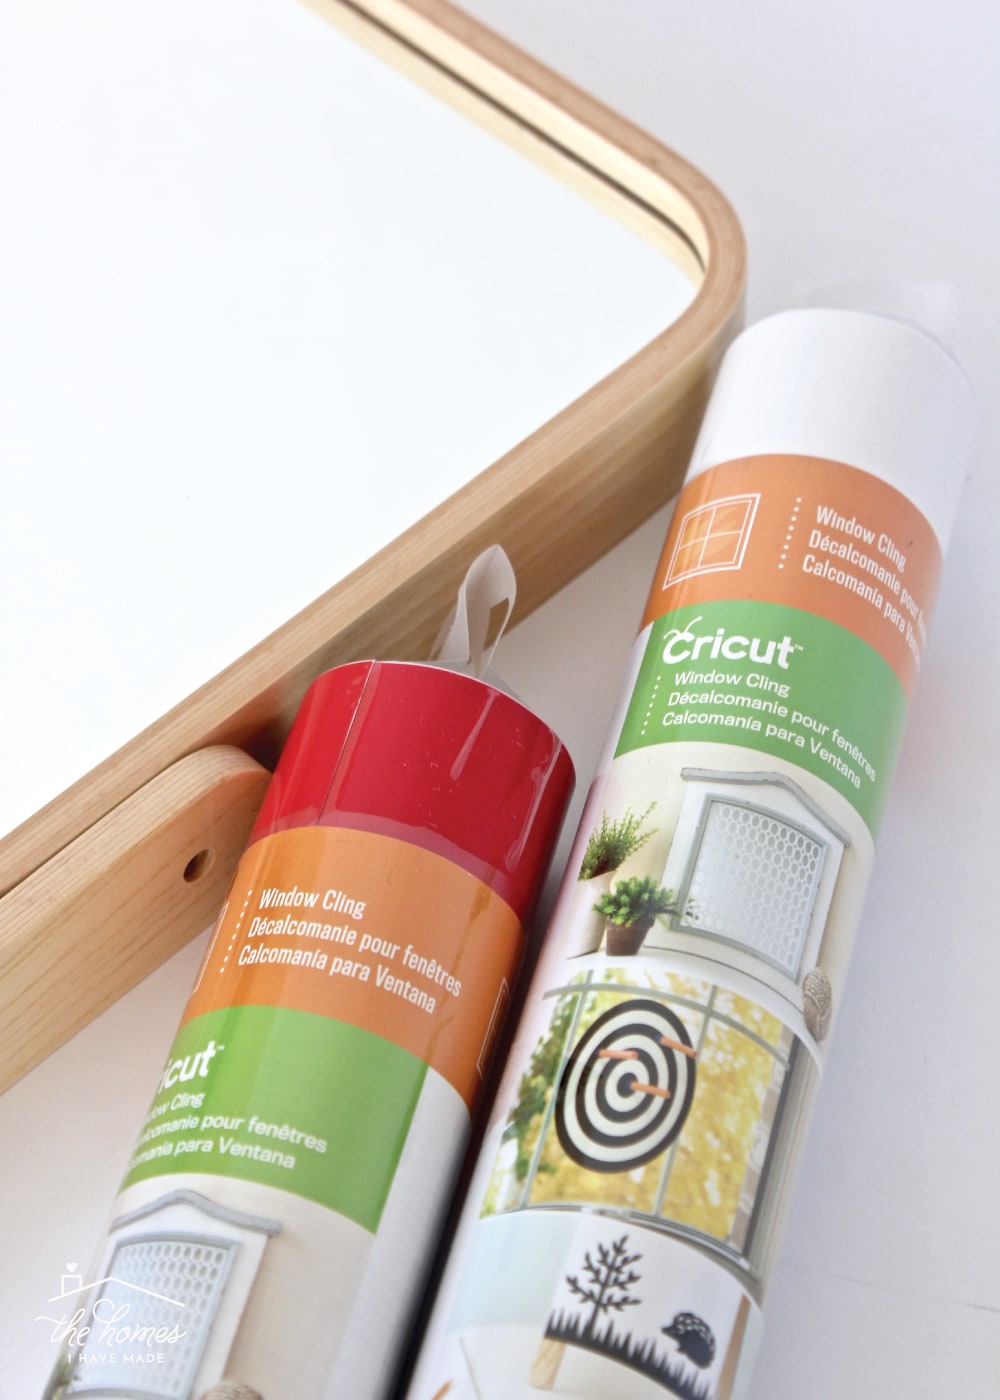
- Cricut'south Window Cling – you'll notice information technology only comes in a few colors
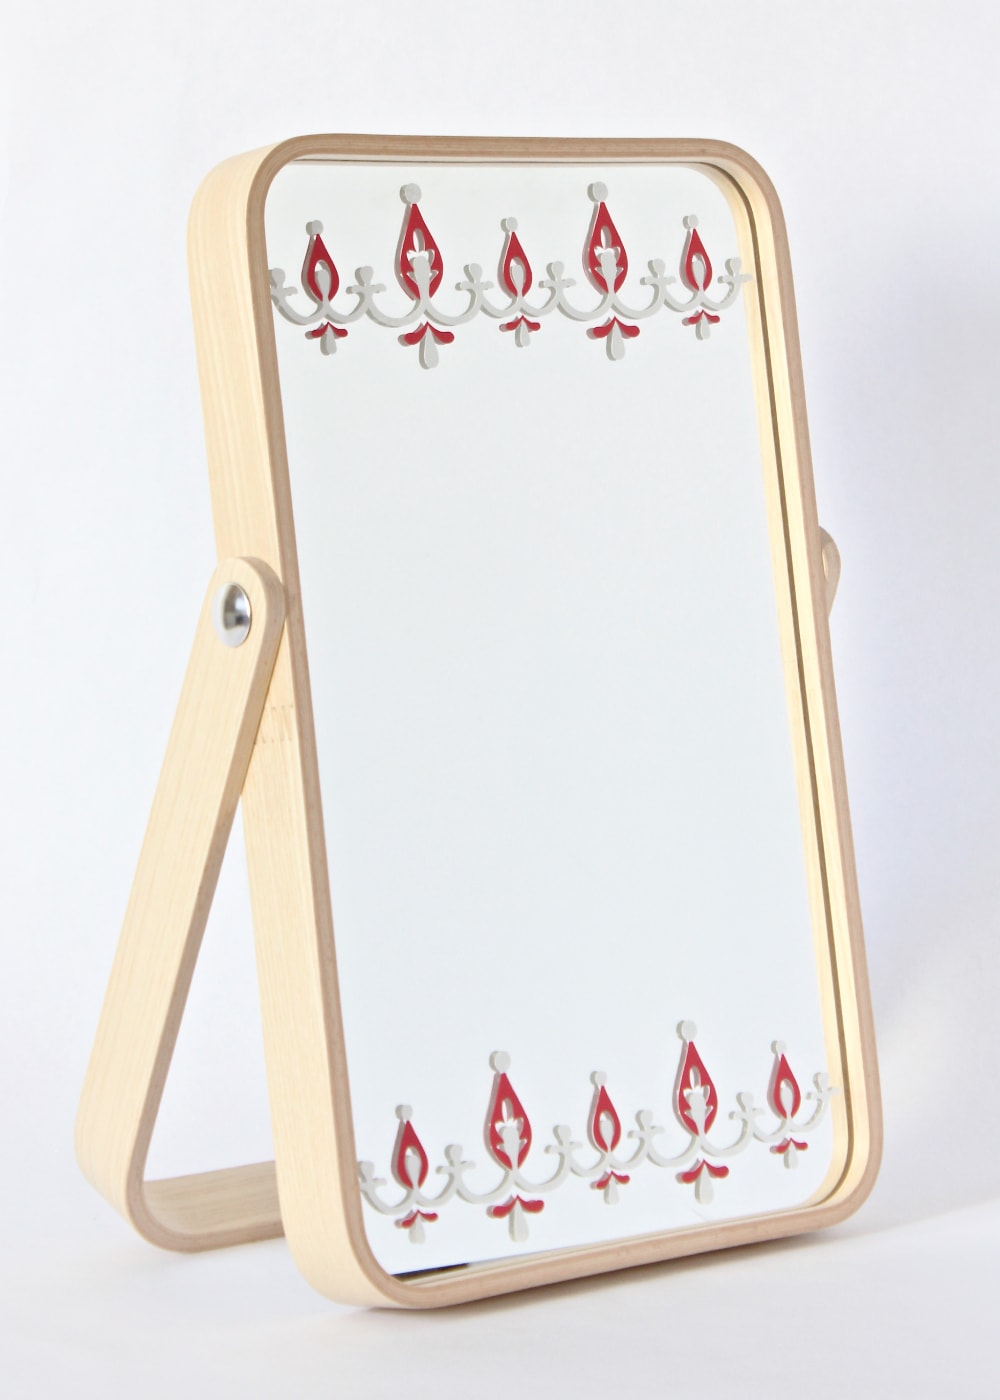
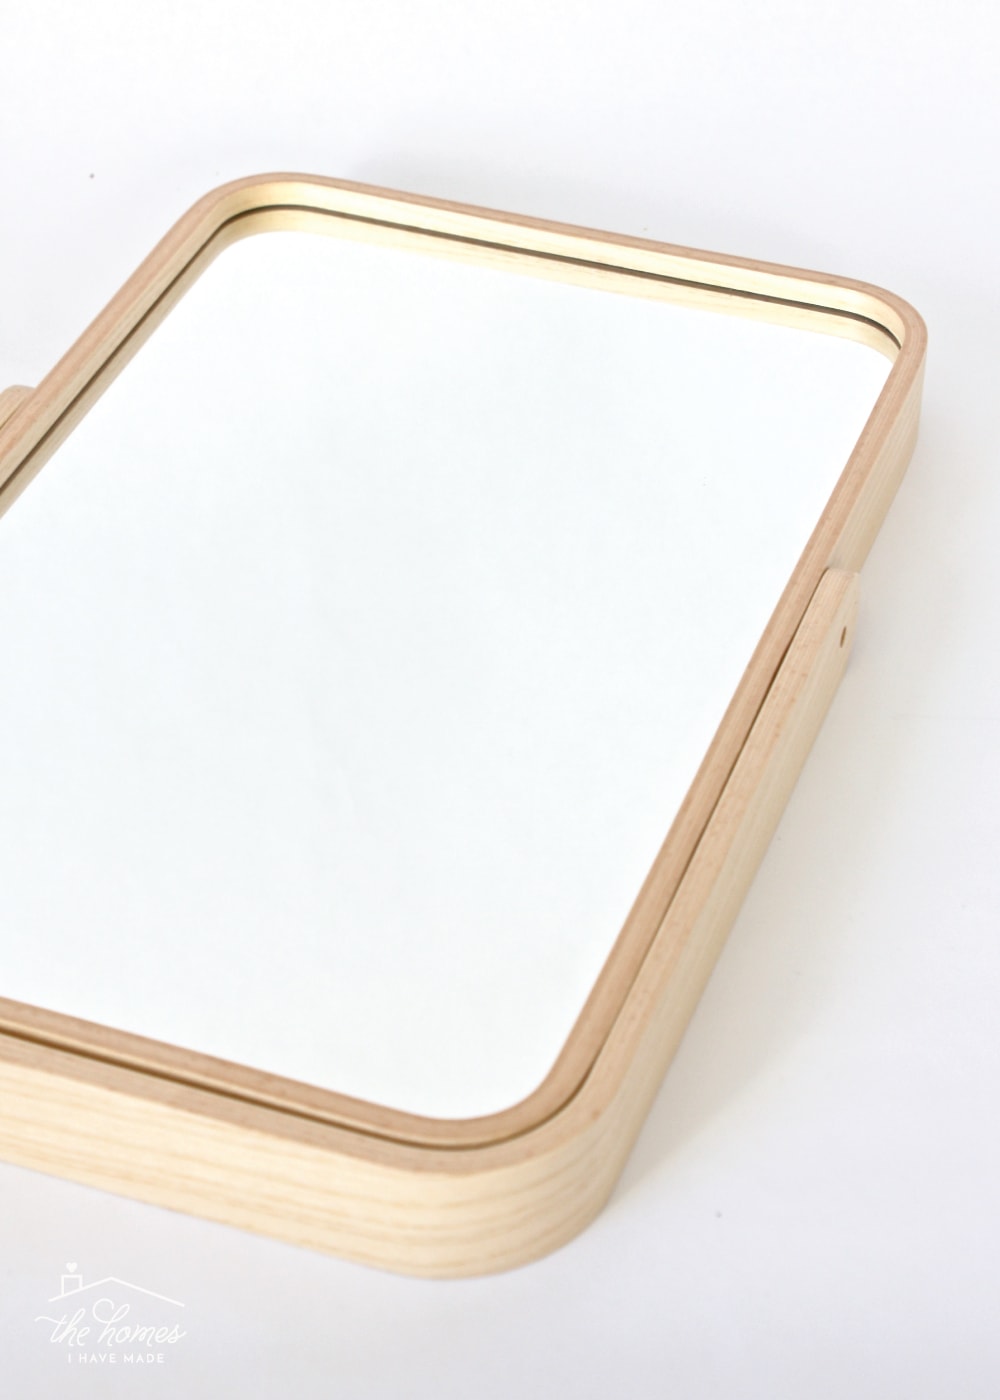
- Glass-similar surface such every bit a mirror, window, windshield, glass, jar, etc. – I used IKEA'southward IKORNNES Mirror
- Whatever Cricut auto (Cricut Joy | Cricut Explore series | Cricut Maker serial)
- Weeding tool or seam ripper
- Scraper tool
TIP! A lot of Cricut'due south vinyl looks the same when rolled up. Await for the Window Cling symbol forth the top of the rolls and and so be certain to label information technology for future projects if you lot throw the packaging away.
How to Cut Window Cling on a Cricut
Start, just as yous would with any Cricut-related projection, by creating your design in Cricut Blueprint Infinite. In my experience, the Window Cling cuts simply equally nicely equally standard vinyl, so don't hesitate to design whatsoever your center'due south desire!
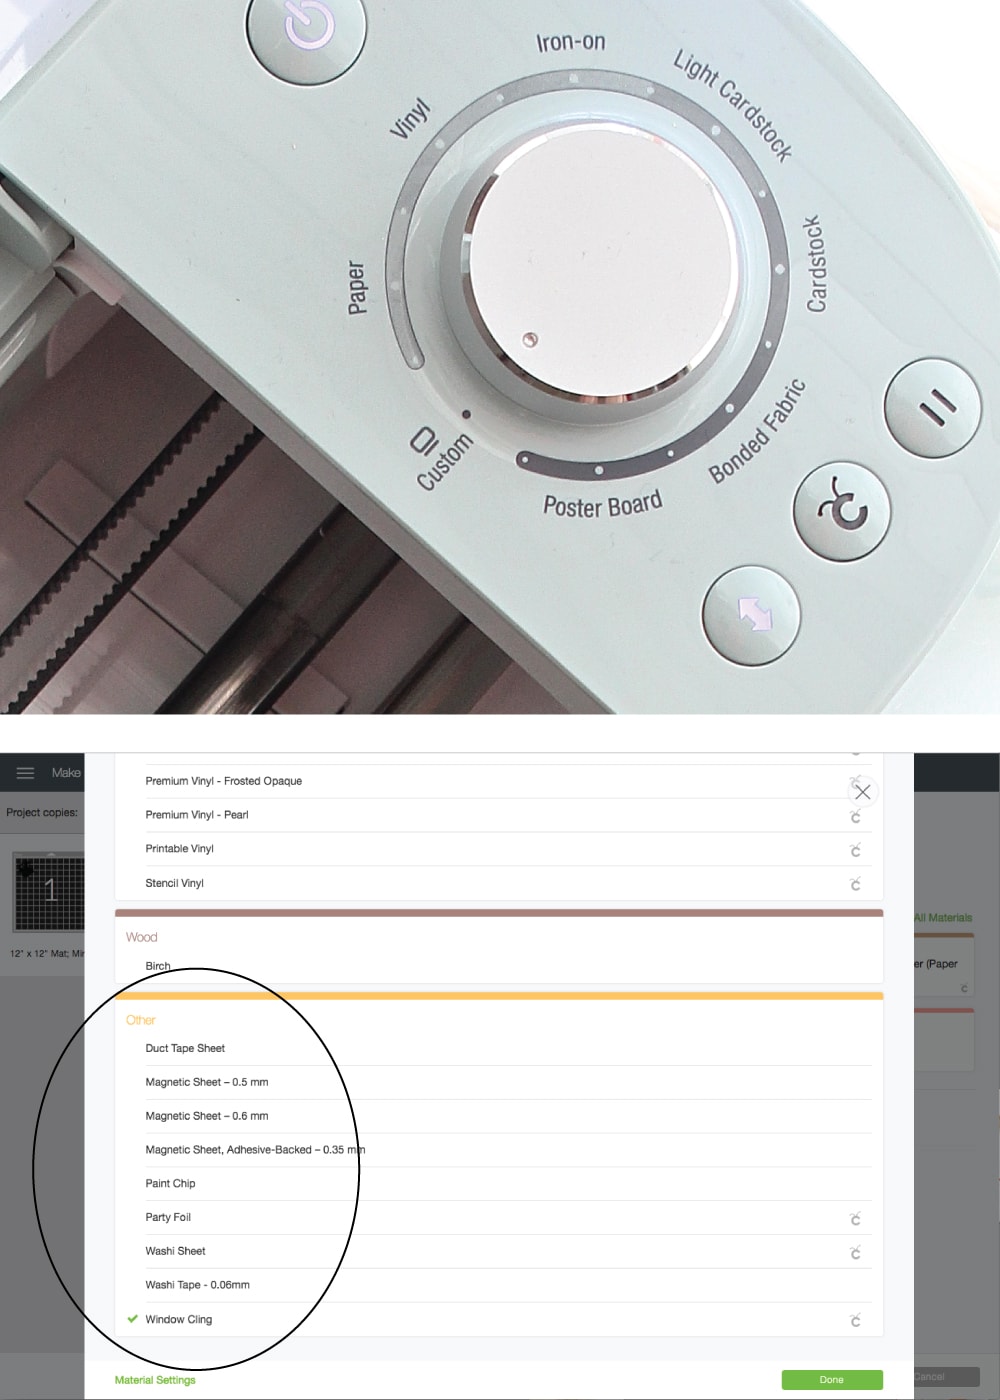
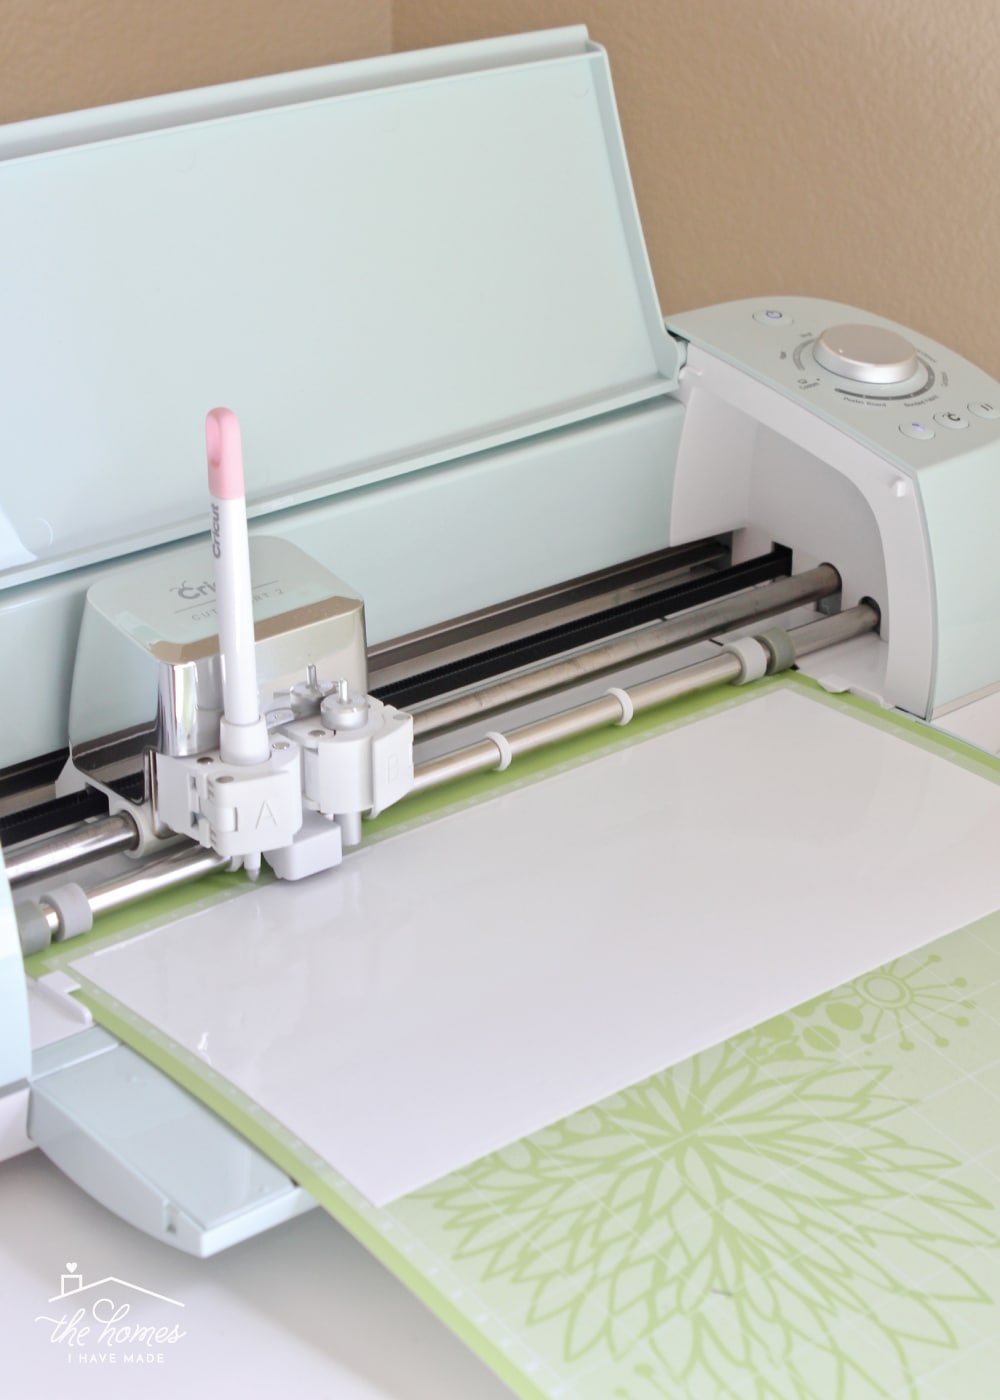
When you are ready to cut your blueprint, click the greenish "Make It" button. If necessary, set your Cricut's dial to "Custom" so select 'Window Cling' from the Custom Materials Menu.
IMPORTANT! You lot will soon see that Window Cling does not transfer to your project in the same fashion standard vinyl does. Therefor, if you've created a directional design (especially one that includes text), y'all MUST select 'Mirror' in the cut settings (just as you would for heat-transfer vinyl). So before cut out your blueprint, exist sure the 'Mirror' push is turned to green on the cut screen.
With the reckoner and punch settings adjusted, load the Window Cling onto your mat (just as you would standard vinyl) with the liner side down and the Window Cling surface up. Load the vinyl into your machine and so press the flashing push button to cut out your design from the Window Cling.
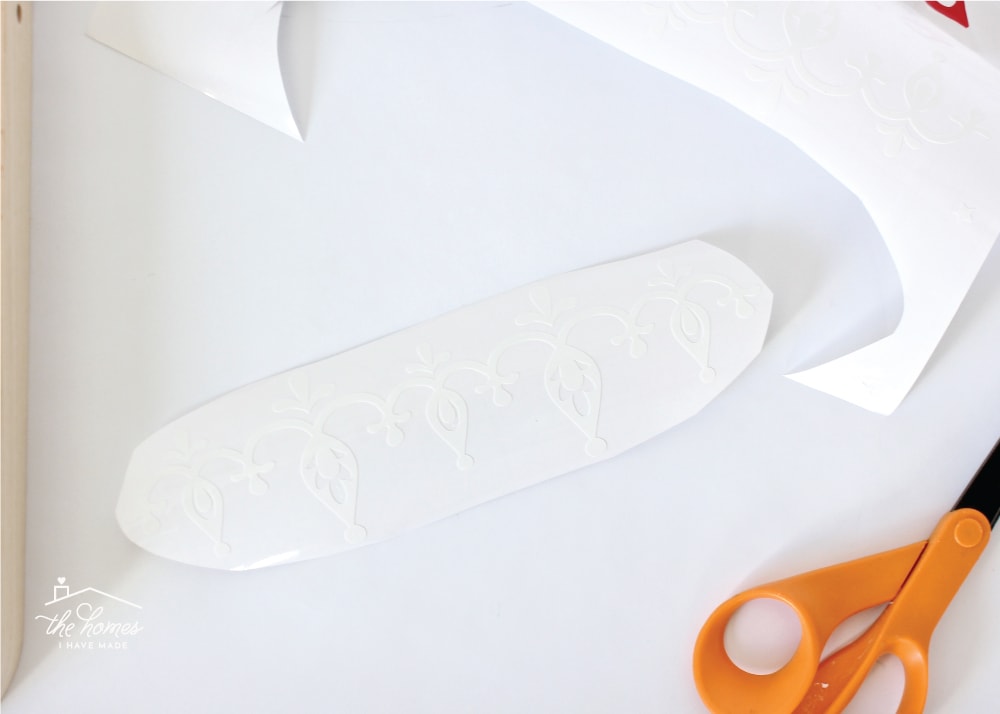
Adjacent, utilise the Weeding Tool or a seam ripper to weed out the negative parts of your blueprint, just every bit you would with a regular vinyl project. Take intendance to remove whatsoever small details that aren't a part of your project.
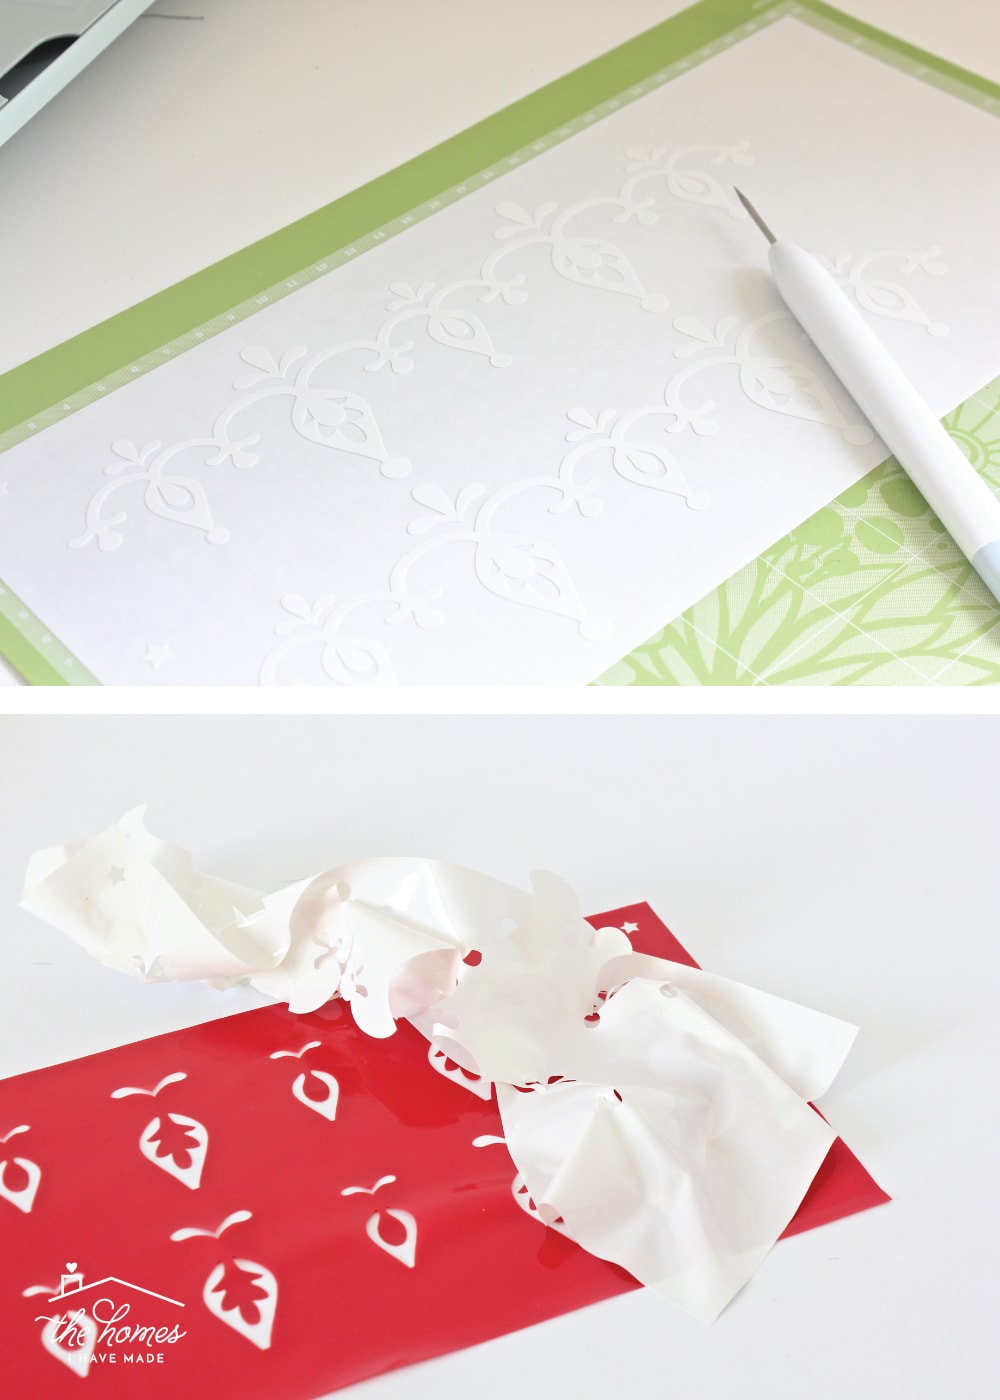
With your designs cut and weeded, it's fourth dimension to get them ready for transfer onto your glass-similar surface!
How to Apply Window Cling to Your Projection
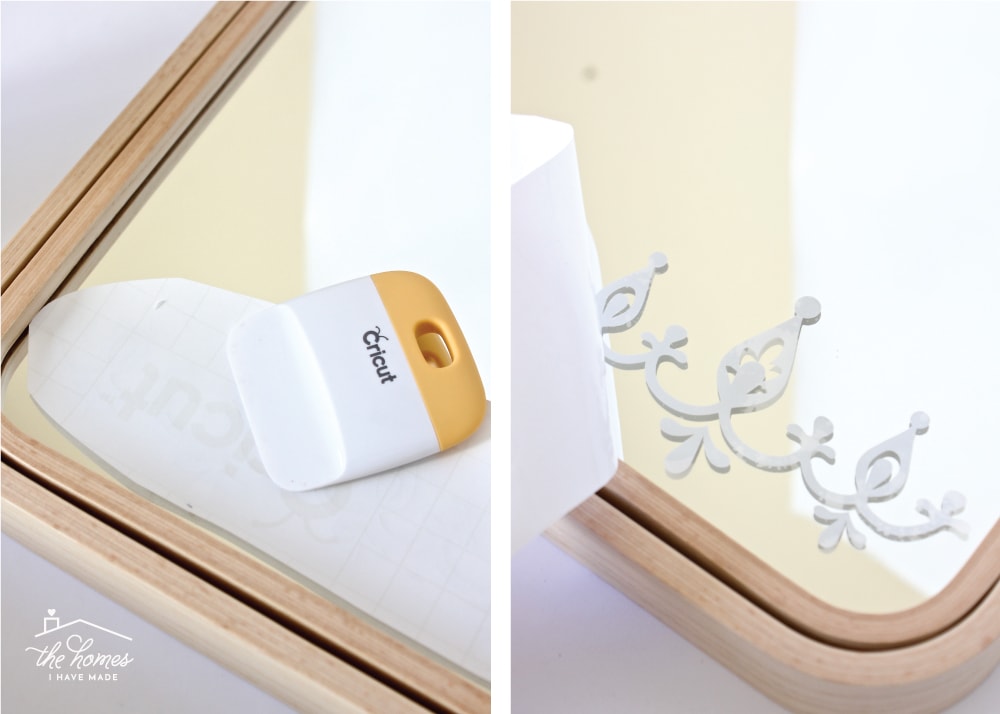
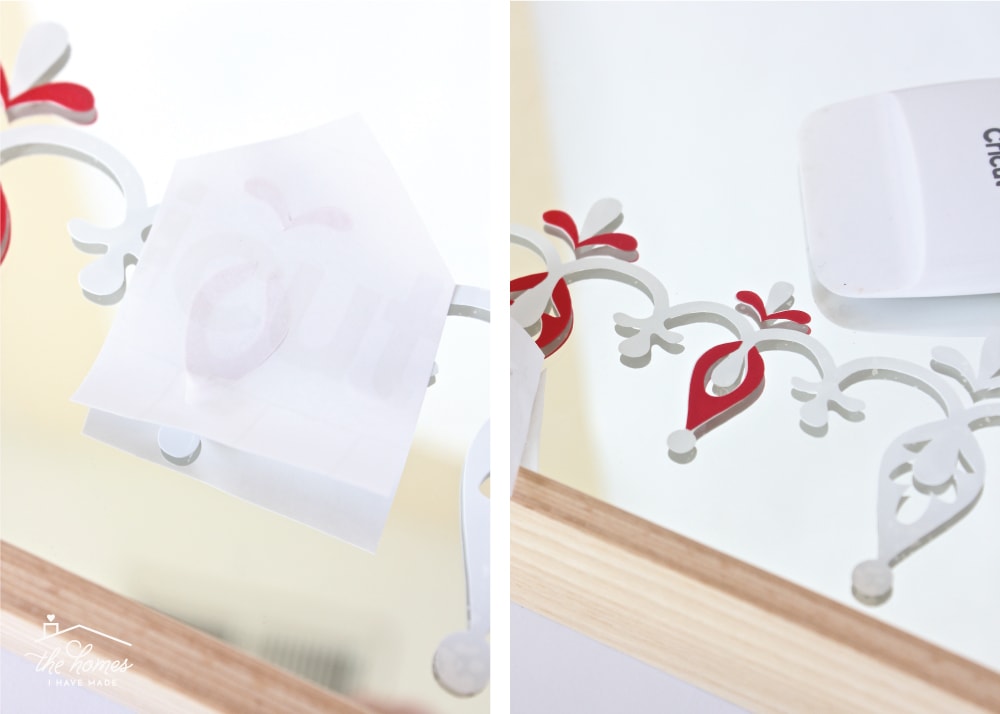
Applying Window Cling to your projection is where the similarities to standard vinyl end. Window Cling isn't about every bit sticky as standard vinyl, so you will Non need or desire to use transfer paper for awarding. Instead, the liner sheet (the white paper backing to the Window Cling itself) volition act equally your transfer paper (which is why we cut the image in 'Mirror' setting).
It tin be hard to see your design through the white paper, so I found it easiest to trim away the liner paper as close to my design as possible.
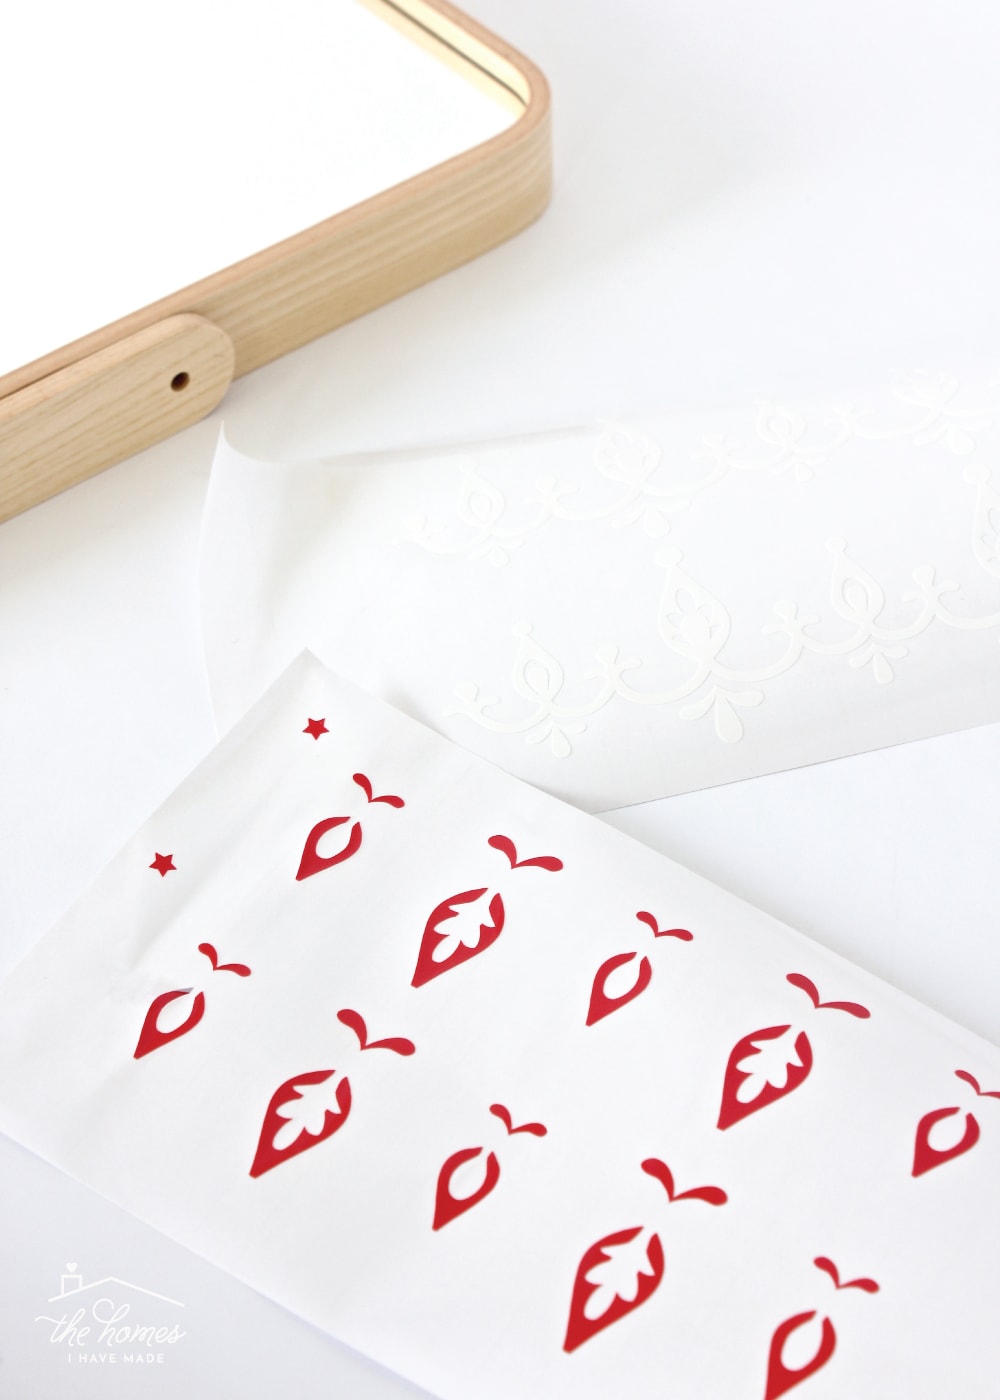
Next, ensure your glossy surface is clean and dry.
Then, place your design onto your glossy surface with the Window Cling pattern facing down, paper liner up. Next, use the scraper tool to polish the vinyl design downwardly onto the glass surface. Finally, carefully peel away the paper liner to reveal your design transferred to your projection!
Similar other vinyls, Window Cling can also be layered…although I suggest merely layering two colors as information technology can get pretty thick (Window Cling is a bit thicker than standard vinyl). Again, seeing through the white liner can make it difficult to line up your images perfectly, so similar before, I propose trimming down your layers as much equally possible…
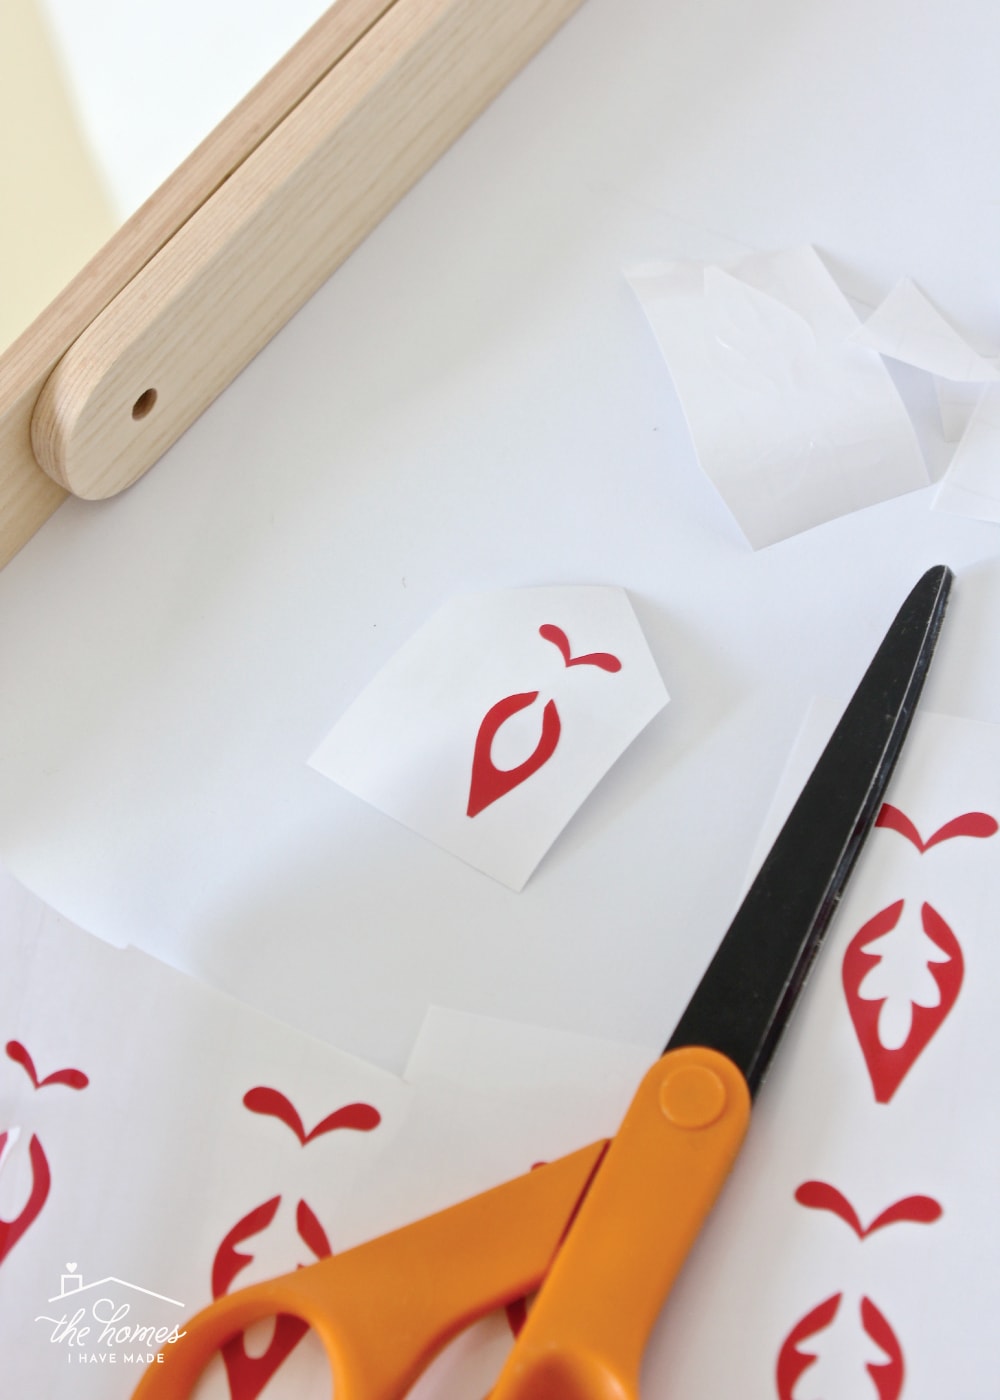
…and smoothing on additional details piece by piece…just as before.
And only similar that…seriously, so quick!…you have a fun temporary design to dress up whatever sleeky surface in your domicile!
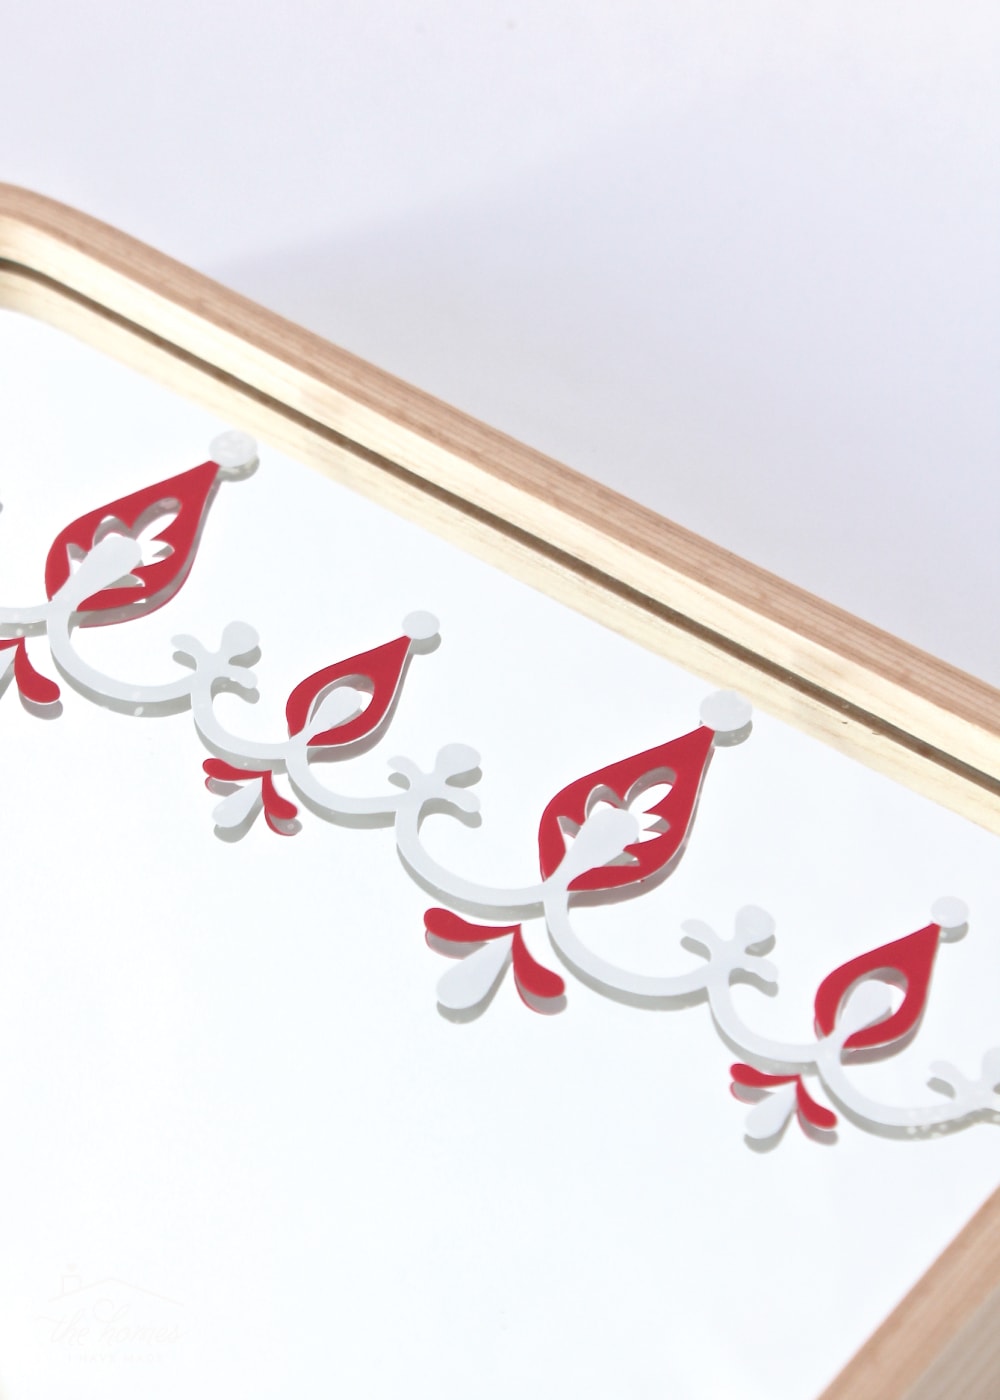
Although I just added a elementary festive item to this mirror, Window Cling on a Cricut would be ideal for cut snowflakes, jolly phrases so much more than to decorate your windows, frames, mirrors, etc (in a completely mess gratuitous and temporary style) this vacation season! It'southward also a great way to display "Happy Altogether" on a bedroom mirror or obstruct low-cal/create privacy on a poorly-placed window. Then many fun possibilities!
Although Window Cling on a Cricut is not a product I thought I'd utilise, it's been really fun to play with and begin uses for it. I'd honey to hear if you've tried it or what fun ways you might use this production in your own home! Until then, have a great weekend and I'll see y'all dorsum here next week!
Come across Yous Soon!
Megan
Source: https://thehomesihavemade.com/window-cling-on-a-cricut-explore/
Posted by: oharewhouse.blogspot.com
0 Response to "How To Make A Window Cling Stick"
Post a Comment