How To Develop Android Apps On Windows
One of the strengths of the Android platform compared to iOS, for example, is that it has an open source basis, which makes it easier to produce your own applications and distribute them without waiting for a lengthy approval process.
You can set up your own Android app on your PC as long as you have the right software installed, and you can even take it for a test drive using an Android emulator so you can see what it will look like when it's run on a smartphone.
There are two techniques that you can use to produce Android applications with a PC. The first uses the Android Software Development Kit (SDK). This lets you write raw code and helps you get it working in the Android environment. The second uses App Inventor, a Google Labs tool that's still in beta.
This provides you with a simple drag-and-drop environment that you can use to generate new applications made up of building blocks of code and media. It's an attempt to make application development possible for people who aren't hardcore coders, but it's not recommended for production environments.
Assuming that you'd like to try the full coded environment, we'll demonstrate how to produce a simple 'hello world' application. If you'd rather work in a GUI, we'll discuss App Inventor later on. Android apps are written in Java code, so you'll need a Java development kit installed on your PC. You also need an integrated development environment (IDE) so you can write and test the code.
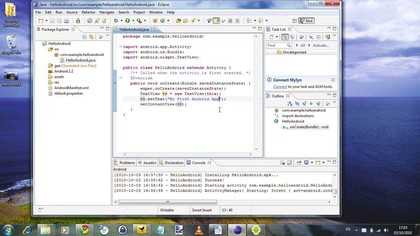
You also need to get your computer ready for the Android SDK. Start by installing a Java Development Kit for your version of Windows.
You also need to install Eclipse IDE for Java developers. When you install Eclipse it will check for the JDK. It's best to unzip Eclipse in the same directory as the JDK. If it can't find the JDK it won't install, but you can always move the required files to whatever directory the Eclipse installer is examining.
With Eclipse up and running, you can download the Android SDK. Extract it to a safe directory on your PC and make a note of where it is.
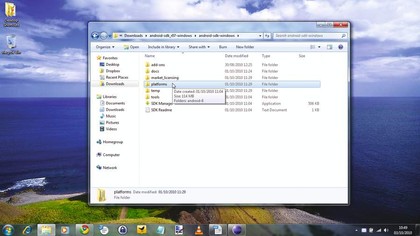
Back in Eclipse you need to add the Android Development Tools. To do this, choose 'Help > Install new software'. Next to 'Work with', enter https://dl-ssl.google.com/android/eclipse and click 'Add'. In the pane below this, check 'Development tools' and click 'Next'. Select 'Android DDMS' and 'Android Development Tools'. Click 'Next', accept the terms and restart.
You need to point the ADT plugin to where you extracted the Android SDK. In Eclipse choose 'Window > Preferences > Android'. Next to 'SDK location' click 'Browse' and locate the folder with the SDK. Click 'Apply' and 'OK'
Android platform
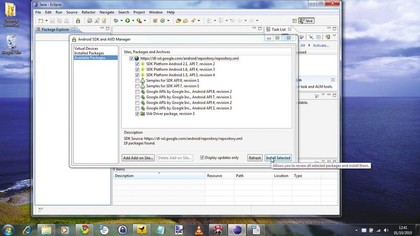
Now that you've sorted out the programming environment, you also need to get at least one version of the Android platform. You can do this in the Android SDK and AVD Manager, which you can launch in Eclipse if you've set your system up correctly.
Choose 'Window > Android SDK and AVD Manager' to open it, then select 'Available packages' and tick the box next to 'https://dl-ssl.google.com/android/repository/repository.xml'.
After a brief scan of the repository, you'll see the available components. Tick those that you want to install and clear the rest. The most important package to install is the latest version of the Android platform. You'll only need older ones if you plan to release your app and need to test it in a range of different versions. At this stage you can also clear the samples, Google APIs and USB driver. If you need any of these later, you can always go back and install them.
Click 'Install selected' and wait for the components to download. Verify and accept the new components if prompted and they will be added to your existing Android SDK folders.
Android virtual devices
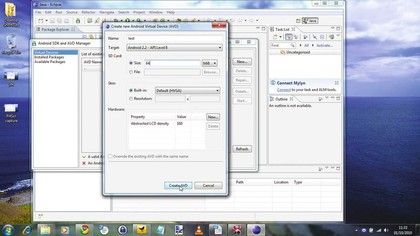
Having downloaded a version of Android, you need to set up an Android Virtual Device (AVD) to run the computer. You can do this in the Android SDK and AVD Manager. Choose 'Window > Android SDK and AVD manager' and select 'Virtual devices'. Click 'New' and provide a name for your new device. Select the Android platform that you want to use as the target. Click 'Create AVD'.
If you want to test your application under different versions of Android, you'll need to create a new virtual device for each version of the platform. You can also specify other parameters here, including the presence and size of an SD card. It's also possible to select a file to use as a virtual SD card.
You can opt to use the built-in skin (recommended) or specify the resolution that you want to use. Under 'Hardware', click 'New' and select a device if you want to add more virtual hardware.
For a simple AVD, you'll generally be fine sticking with the default options. You can now close the Android SDK and AVD Manager.
Create and emulate your Android app
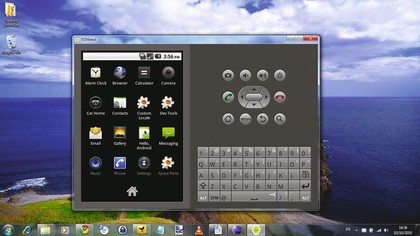
Assuming you now have all the software in place and you've set up a virtual device in the Android SDK and AVD manager, you can create a new project. In Eclipse IDE choose 'File > New > Project'. In the New Project wizard, select the 'Android' folder and choose 'Android project'. Click 'Next'. You now have a new window for your project details.
To start with, we'll set up a simple 'Hello world' application that just displays some text when launched. In the field marked 'Project name', enter HelloAndroid. For 'Application name' enter Hello, Android. For 'Package name' supply com.example.helloandroid and for 'CreateActivity', enter HelloAndroid. Click 'Finish'. These parameters are used to set up your project in Eclipse.
The project name is also the name for the directory in your workspace that will contain your project files. Eclipse will create it for you. Assuming you accepted the default Windows workspace of C:\Users\[username]\workspace, you'll find the above directory at C:\Users\[username]\workspace\HelloAndroid.
If you browse to this in Windows Explorer, you'll see a number of subfolders and files set up as part of the project.
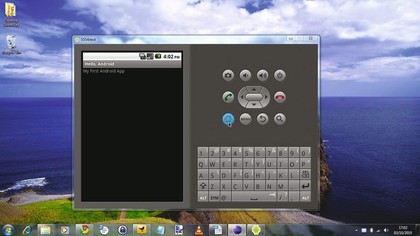
The application name is the title of your app, which will be displayed in the Android device. Change this to change the name of the app. You need to be a bit more careful with the package name.
This is the namespace for the package where your source code resides. It needs to follow the rules for naming packages in Java. It also needs to be unique across the Android system, which is why a domain style package is used; 'com.example' is reserved for examples like this.
If you develop an app that's published, you'll need to use your own namespace. This usually relates to the organisation publishing the app.
'Create activity' relates to the class stub generated by the plug-in. An activity is basically an action. It might need to set up a user interface if it needs one. We left other project fields at their default values, but it's useful to know what they do. 'Min SDK version' lets you set the minimum API required by your application.
If 'Use default location' is ticked, your project will be saved in your workspace. You can opt to change this if you want to store the files elsewhere. 'Build target' is the platform target for your application. It's the minimum version of Android that it will run on.
If you develop an app to run on an earlier version of Android, it should run on a later one too, but one developed for a later version of the platform probably won't run on an earlier version. For an example like this, the build target isn't critical as long as you can get your application to run in the emulator. It's more of a concern when you come to release an app.
Finally, the option to create the project from an existing example enables you to select some existing code to modify. You'll find this of more interest as you move on to greater programming challenges.
Modify the code
You should now see your project displayed in the Package Explorer, which is shown in the left-hand pane of Eclipse. Double-click 'HelloAndroid' to expand it. Also expand 'src' and 'com.example.helloandroid'. Double-click 'HelloAndroid.java' to see the code that's already been set up. In the main pane you should see the following text:
package com.example.helloandroid;
import android.app.Activity;
import android.os.Bundle;
public class HelloAndroid extends Activity {
/** Called when the activity is first created. */
@Override
public void onCreate(BundlesavedInstanceState) {
super.onCreate(savedInstanceState);
setContentView(R.layout.main);
}
}
If you can't see all of this, try looking to the left-hand side of the pane and expanding any plus signs that indicate collapsed code. This defines your application without actually doing anything at this stage. To make it do some work, we need to add an object that will contain your text.
Having done that, we also need to specify the text. Below 'import android. os.Bundle;' add the following line:
import android.widget.TextView;
Also add the following above the two sets of closing curly brackets:
TextView tv = new TextView(this);
tv.setText("My First Android App"); setContentView(tv);
You can replace the text within the quotes to make your app say whatever you like. Check that the code in its entirety reads as the following, assuming you kept the displayed text the same:
package com.example.helloandroid;
import android.app.Activity;
import android.os.Bundle;
import android.widget.TextView;
public class HelloAndroid extends Activity {
/** Called when the activity is first created. */
@Override
public void onCreate(BundlesavedInstanceState) {
super.onCreate(savedInstanceState);
TextView tv = new TextView(this);
tv.setText("My First Android App");
setContentView(tv);
}
}
Save the changes to your code. You can now try it out in the Android emulator. In Eclipse, choose 'Run > Run > Android application'. The emulator launches. It can take a few minutes to boot into Android, so be patient. Once booted, your app should run automatically and you'll see a grey title bar with the app name in it. Below this, your chosen text is displayed.
Press the 'Home' button in the emulator to return to the Android home screen. Click the 'Applications' button to see the list of available applications. Among these you should see 'Hello, Android'. Select this to launch your app again.
Test your app on an Android device
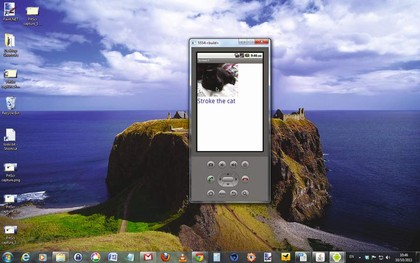
Now you've successfully run your app in the emulator, you can try running it on a real device. First you need to ensure that the USB driver is installed in the Android SDK and AVD manager. Choose 'Window > Android SDK and AVD manager > Available packages'. Select the Android repository, ensure that the USB driver is ticked and click 'Install selected'.
Connect your phone to a spare USB port and wait for Windows to detect it. In the New Hardware wizard, choose 'Locate and install drivers' and opt to browse your computer for the driver software. Browse to the 'Android SDK' folder and locate the subfolder for the USB driver. Windows should find and install it from here.
Now you need to declare your app as debuggable. In Eclipse, expand your HelloAndroid application and double-click 'AndroidManifest.xlm'. Move to the 'Application' tab and select 'True' from the Debuggable dropdown list. Save the project.
Go to your Android phone and choose 'Menu' from the home screen, then select 'Applications > Development' and enable USB debugging. Now you can reconnect it to your PC via USB. If you want to check that the SDK can see your phone, browse to the 'Tools' directory in your 'Android SDK' folder. Launch 'adb.exe' and you should be able to see your phone listed as 'Device'.
To launch your application on the connected phone, you need to choose 'Run > Run > Android application in Eclipse'. Now you have both the emulator and your phone connected, you need to specify which you want to run it on. Eclipse presents you with a Device Chooser that lists all the available devices and emulators. Select your phone from this list to install and run the app.
Now you've produced and run a very basic application from raw code in an emulator and on an Android device, you can begin to learn how to develop your own. It helps to have some knowledge of Java programming, but you'll also find a number of stepped tutorials in the Android Developer Resources pages.
These include introductions to the different views available to apps and how to implement them. You'll also find ways to use common resources like location information, and find out how to debug your work.
You can find a full list of sample code on these pages too. This will help you to work through example applications that you can modify to your own ends. These include games such as Snake and Lunar Lander, plus utilities like Note Pad and Wiktionary. You can find even more samples at Apps-for-Android.
How To Develop Android Apps On Windows
Source: https://www.techradar.com/news/phone-and-communications/mobile-phones/how-to-build-an-android-app-1046599
Posted by: oharewhouse.blogspot.com

0 Response to "How To Develop Android Apps On Windows"
Post a Comment